Let’s assume you have just been in an area with known tick populations. You used tick repellent, but you still want to check yourself for ticks. Perhaps you were on a hike in long grass, at a dog park, or having a picnic with your family in the great outdoors. We all know that ticks are annoying and can be more than a little dangerous. Now that you are done, how do you best check you and your family for ticks? Even though you took some preventative steps for keeping ticks away, checking for ticks needs to be an automatic step after every outing.
Knowing how to quickly and effectively check yourself for ticks just might become one of those life skills that saves your hide!
We have found a 4-step system that works well, and we will share it with you here.
Step 1: Do a simple once-over
This might seem obvious, but many people are too excited to hit the road from whatever they were doing to take a good look at themselves. Immediately after being in a likely tick area, do a cursory once-over of yourself and your children. We are not suggesting you strip down (we will get to that later) but it is a good idea to look at your clothing and exposed skin to see if there are any ticks sitting or moving on you. Run your fingers through your hair, feel the back of your neck, and if you have someone with you have them take a look at the back of your clothing. Denim can be difficult to see ticks on, so if you are wearing that, take a little extra time. Don’t forget your shoes, which often have many different crevices for a tick to hide in, and pay attention to any nook and cranny in your clothing like a cuff or a fold.
Step 2: Do a more detailed review
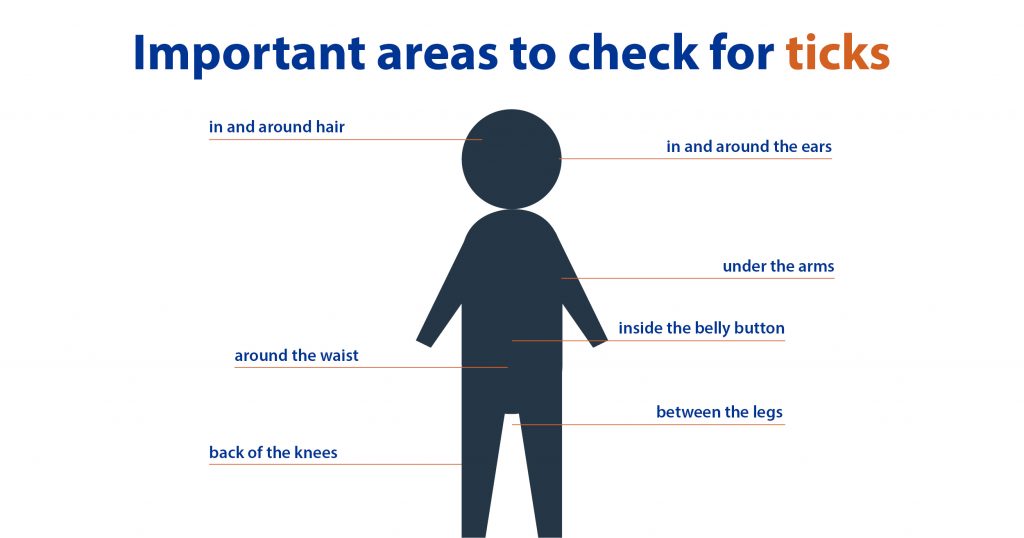
Within 1-2 hours of being in a likely tick area, you should be at a place where you can pause and take a closer look. This is the step that you don’t want to skimp on. Strip down, preferably in a bathroom or somewhere with a mirror, and look for ticks. Use your hand to feel your scalp, areas you cannot see like behind your ears, your crotch, and armpits. Remember that ticks like “hotspots” – anywhere that is warmer or with a skin fold. We have found ticks commonly go to armpits or the area behind knees. Consider showering, but don’t assume that will just wash all the ticks away – they can hang on. If you had children with you, be sure to check them and don’t assume they will find the ticks.
We can’t stress enough the importance of using your hands. So often, a small deer tick is simply a slight bump on your skin, barely visible to the naked eye. If you feel a bump, investigate further.
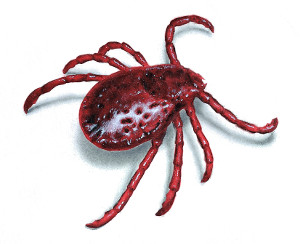
Remember that deer ticks are smaller than wood ticks, so you will have to look carefully. Deer tick nymphs are so small — we’re talking the size of a pin head or poppy seed — that they can often look like a spec of dirt or a small mole or freckle. Wood ticks tend to be a little larger — more like a sesame seed — and a rare usually plainly visible as long as they are not tucked away in a hotspot.
Step 3: Change Clothes
This is often overlooked, but while you are taking a good check for ticks in front of a mirror, they are still making themselves home in the clothes you were wearing. Don’t put them back on! Throw them in the laundry and put new, fresh clothes on. When you do the laundry, be sure to use a dryer if you have access to one. 10 minutes in a hot dryer will eliminate most of the ticks who might be in your clothing.
Step 4: Examine Your Tracks
Ticks have a way of jumping off to other surfaces, and hiding until they find the right host come along. If you were outside at a picnic, take a look at the picnic basket. If you were hunting or hiking, be sure that the backpacks or our gear bags are examined for ticks. Finally, don’t forget your vehicle – the ticks may have latched on to the car seat while you were driving home, and are waiting for you to come back.
The process above is not completely foolproof – you need to be vigilant especially in areas known to have Lyme-carrying ticks or areas known for other tick-borne illnesses. However, if you go through these steps every time you’ve been in a likely tick area, you will give yourself much better odds of keeping ticks from attaching and giving you diseases. It only takes a few minutes. Don’t forget to check others (especially children) as well as your pets who have been with you outside.
Even after doing this 4-step review, be on the lookout for the random straggler tick for a day or two — they have an amazing ability to hide. Play some defense with a good tick repellent when going into tick habitat. Always remember, if you find an attached deer tick and there is a bullseye rash forming, go to a doctor immediately. If caught early, they can help you make sure that any hint of Lyme disease is kept at bay.
Written by Tick and Mosquito Project Staff. Most recently reviewed by Nicole Chinnici, Northeast Wildlife DNA Laboratory Director at East Stroudsburg University